Introducing Custom Standards: Decide What "Passing" Means for Your Podcast
 Damian Moore, Published: 18 October 2026
Until now, every Audio Audit report was judged against the same rules. That suited most shows, but not every team. A network with its own house spec might want −18 to −16 LUFS rather than our −17 to −15. A spoken-word show is happy in mono. A daily news podcast has no use for chapter markers, yet a missing chapter cost its score as much as a peak over −1 dBFS did.
The clearest version of the request came from a podcast network’s technical director, who needed to know “when a producer isn’t using our presets or our specs”. The report had to say when an episode broke their rules, not ours.
Custom standards do that. Every workspace can now define what “passing” means, choose which checks can fail a report and which are only there for information, and pick the standard right where reports start. They’re live on every plan, Free included.
A Standard Is Your Rulebook
A standard is a named set of checks: loudness, peak level, bit rate, silences, chapters, swearing and the rest. Each check in a standard is set to one of three things:
| Setting | What happens |
|---|---|
| Required | The check decides the report’s Passed/Failed verdict. |
| Informational | It runs and is shown, flagged when it’s outside its limit, but never fails the report. |
| Off | It doesn’t run at all, and isn’t charged for. |
Most checks also carry a limit you can change: a loudness window in LUFS, a maximum peak level, a minimum number of chapters, a longest allowed silence.
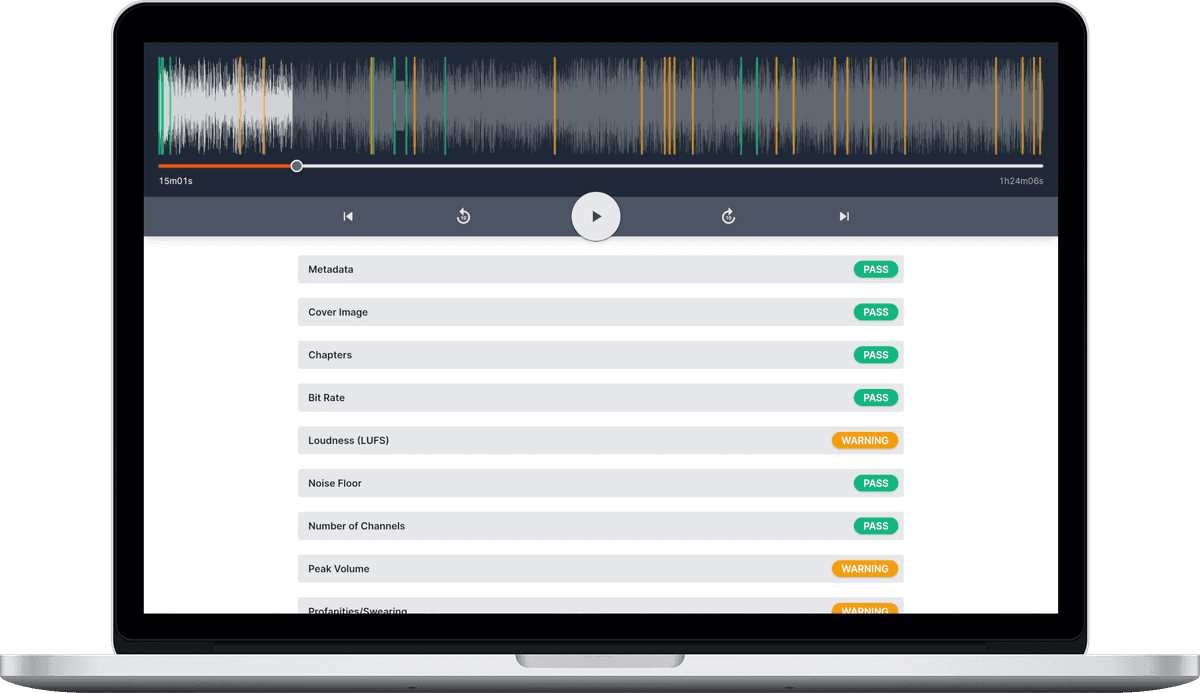
Every report now shows a Passed or Failed verdict based only on its Required checks. The Required checks are listed first. The Informational ones sit in their own section below, headed by a count of how many are outside their limits, and you can fold that section away. The percentage score is still there and counts every check the standard runs, so the two can disagree. The report below scores 73% and still fails, because one Required check, loudness, missed its range.

Three Built-in Standards to Start From
Every workspace can use three read-only standards straight away:
| Standard | Loudness | Peak |
|---|---|---|
| Podcast (the default) | −17 to −15 LUFS | at most −1 dBFS |
| AES speech | −19 to −17 LUFS | at most −1 dBFS |
| EBU R128 | −24 to −22 LUFS | at most −1 dBFS |
Apart from loudness, the three are identical. Podcast is centred on Apple Podcasts’ −16 LUFS target and is what every show uses until you choose otherwise. EBU R128 is the European broadcast standard, centred on −23 LUFS. Our LUFS article lists the targets platform by platform.
To make your own, open Settings → Standards. ”Add standard” starts from the Podcast built-in: give it a name, change what you need, and click ”Create standard”. To start from another built-in’s numbers, click ”Duplicate” on it and name the copy, which opens in the editor. ”Set as default” makes a standard the one used by every show and upload left on the workspace default. A show you’ve given its own standard keeps it.
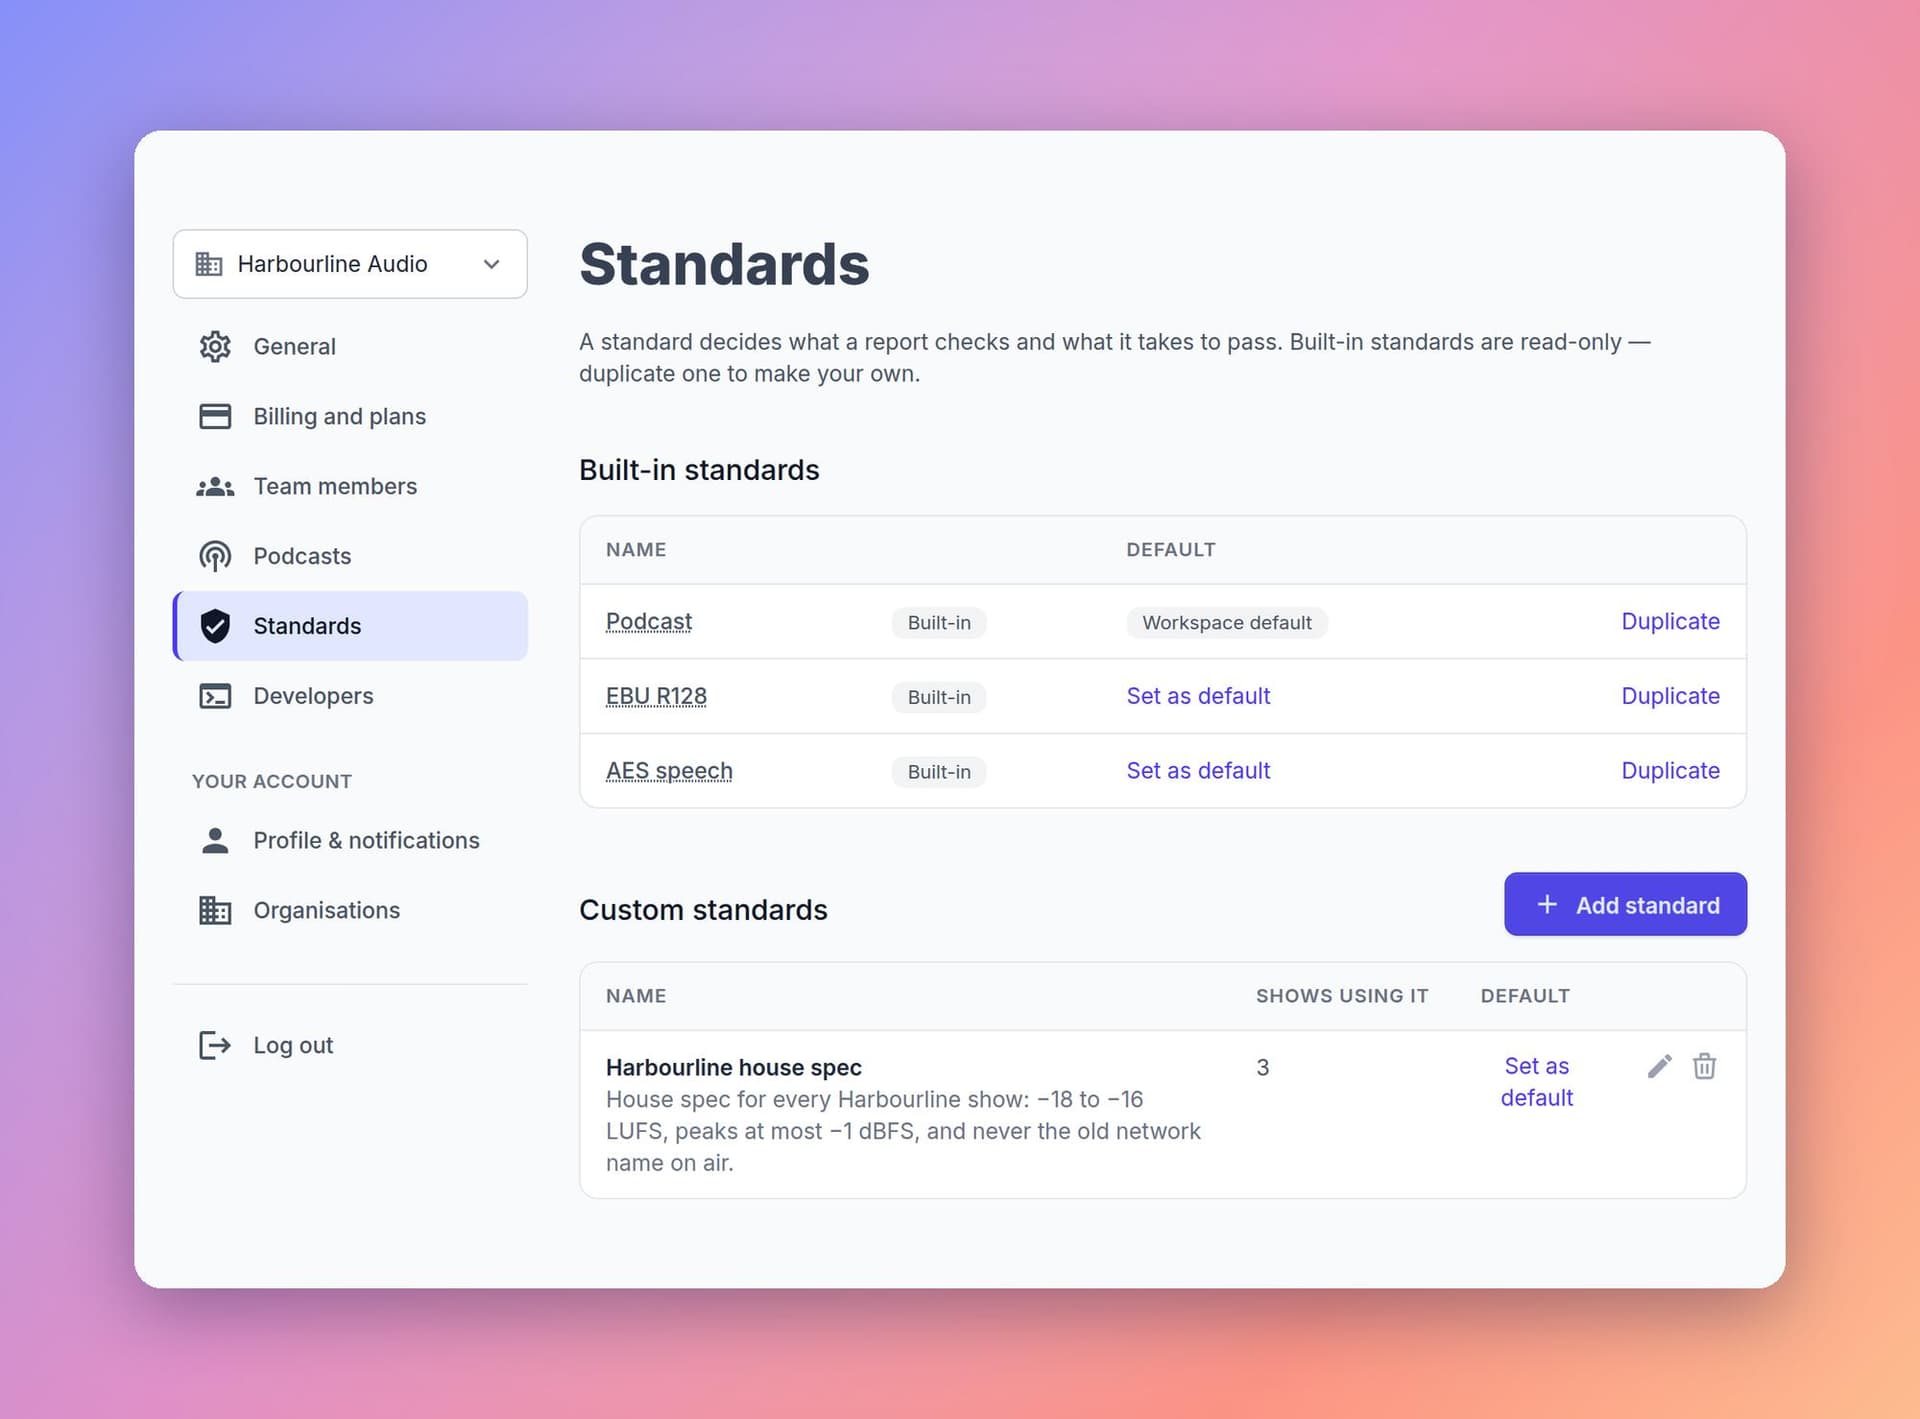
In the editor, each check has its setting and its limit side by side. Here the house spec narrows loudness to −18 to −16 LUFS and leaves RMS loudness Off. If you do need RMS, for audiobooks for example, our RMS loudness article explains when it matters.

Three New Checks for Spoken Content
Custom standards come with three checks built for the things networks police:
| Check | Fails when |
|---|---|
| Explicit flag | An episode contains swearing, heard with at least 75% confidence, but isn’t marked explicit in your feed. An explicit episode with swearing passes, because that’s the flag doing its job. Required in every built-in standard. |
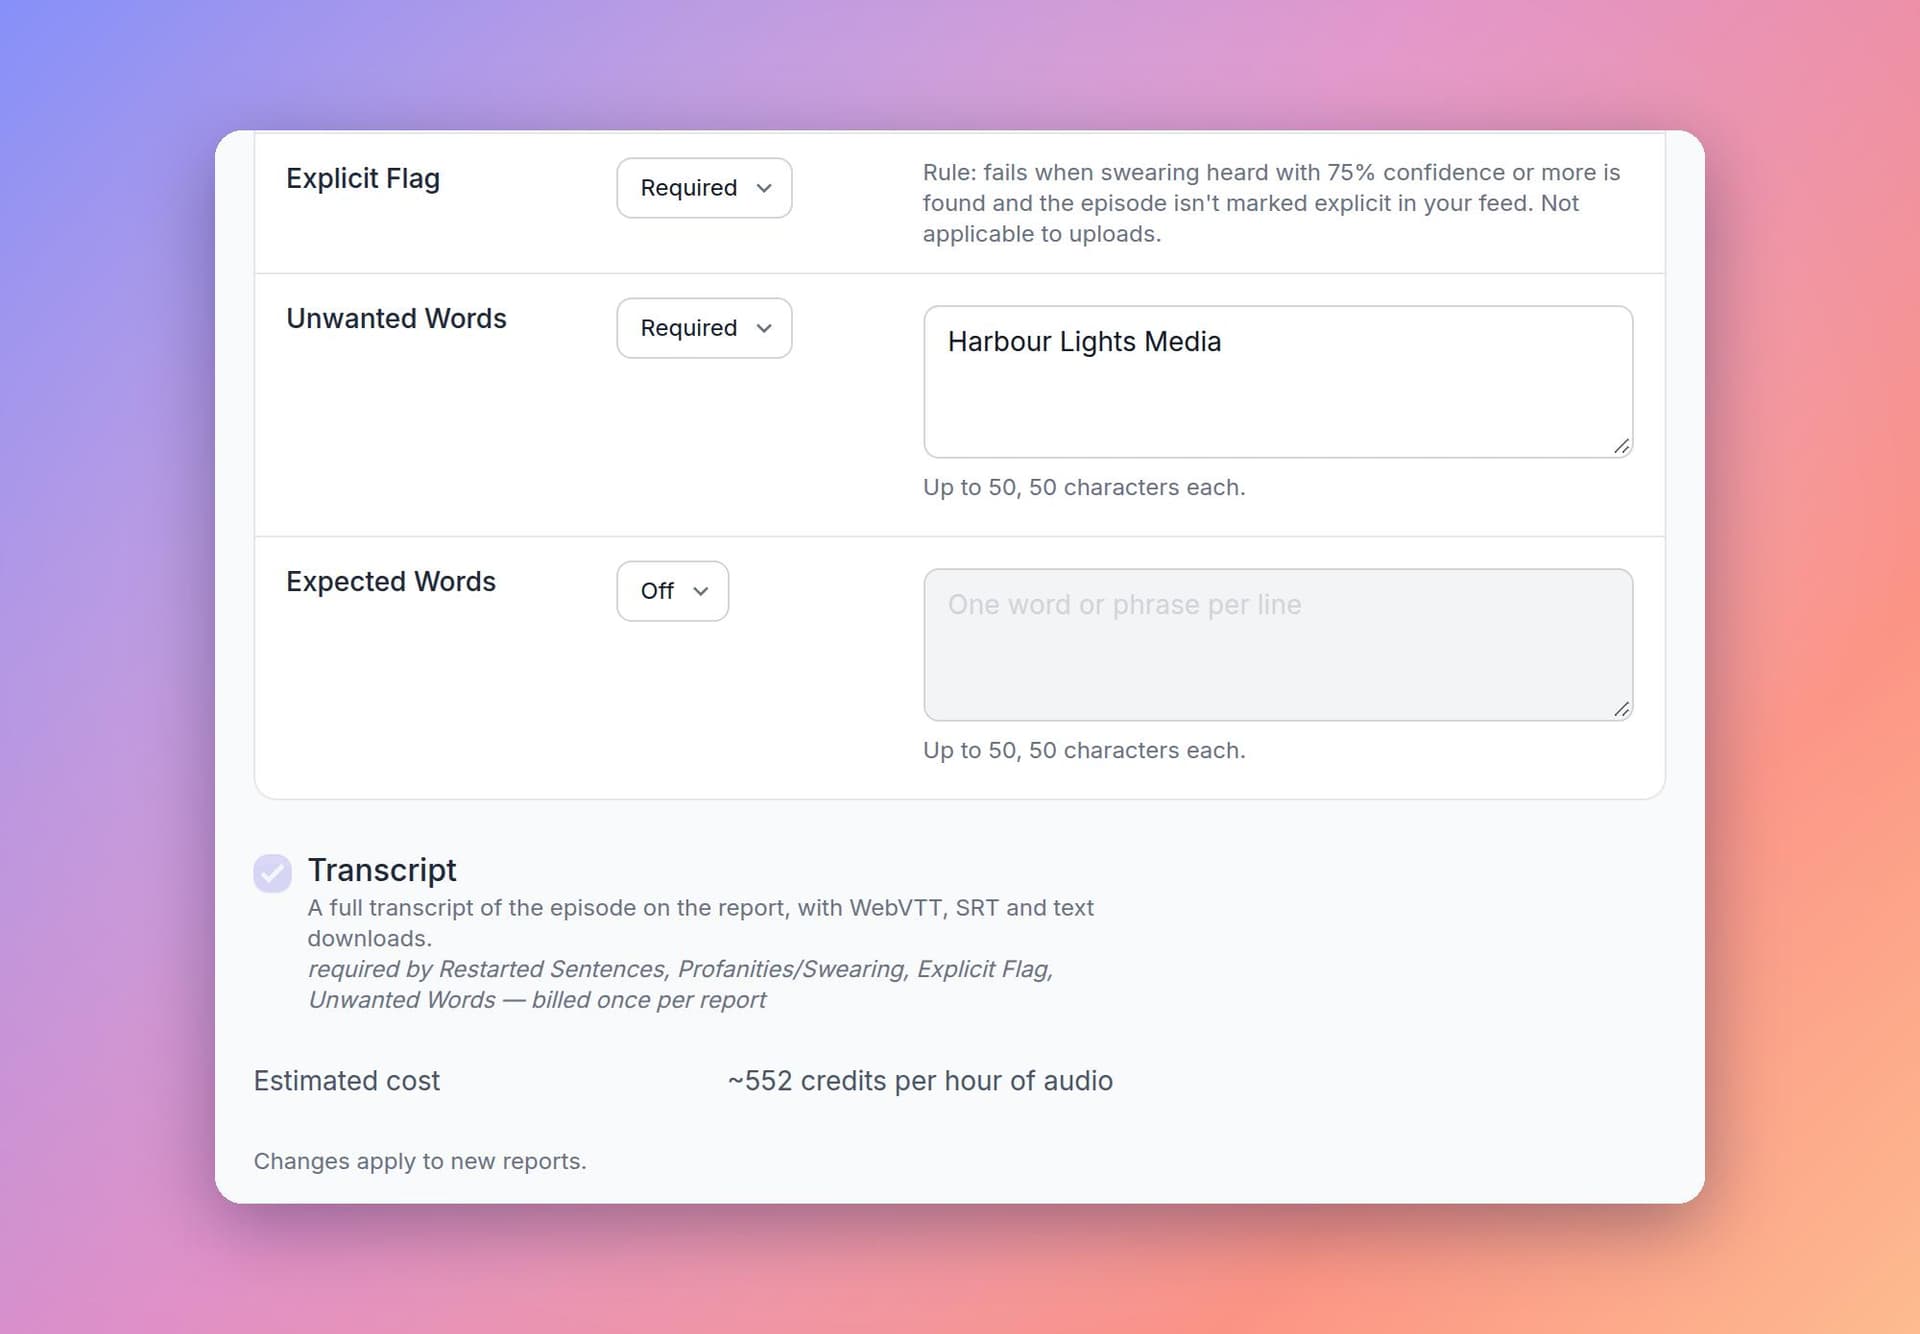
| Unwanted words | Any word or phrase on your list is said: a retired slogan, a competitor’s name, anything that shouldn’t make the final cut. Every occurrence is timestamped. |
| Expected words | A phrase on your list is never said at all. Useful for sponsor reads, membership pitches and legal disclaimers. |
Each word list holds up to 50 words or phrases. The explicit flag applies to feed episodes, not uploads, and is read live from your feed. If an episode fails and you mark it explicit in your hosting platform before your next episode goes out, the report turns green on the next feed check. There’s nothing to retry and no extra credits to pay.
Two other checks pair well with these: silences in the middle of an episode and unwanted noises. Both are Informational in the built-ins, and a custom standard can change their limits or make either one Required.
Give Each Show Its Own Standard
Each show in a workspace can follow its own standard, so a nightly news show and a long-form interview series don’t have to share one spec. Open the show’s settings from Settings → Podcasts, or click Manage on the show’s page. Choose from the Standard menu and click Save. Every feed report for that show is then judged against the standard you picked.
The menu offers Workspace default, with the current default’s name in brackets, and every built-in and custom standard in the workspace. A show left on Workspace default follows whatever the default is, including later changes. Switching a show’s standard applies to its new reports only.
Choose the Standard Where Reports Start
The Dashboard’s Generate Report card now has a ”Check against” control at the top. It applies to both podcast search and file uploads, and shows which standard will judge the report before you start.
The menu lists the workspace default, then your own standards, then the three built-ins. Add a podcast that’s new to the workspace and it keeps the chosen standard for its automatic checks. For a show you already have, the choice applies to that one report. Owners and Admins also get ”+ Create custom standard…” at the bottom, which opens the editor and brings you back to the Dashboard with the new standard selected.
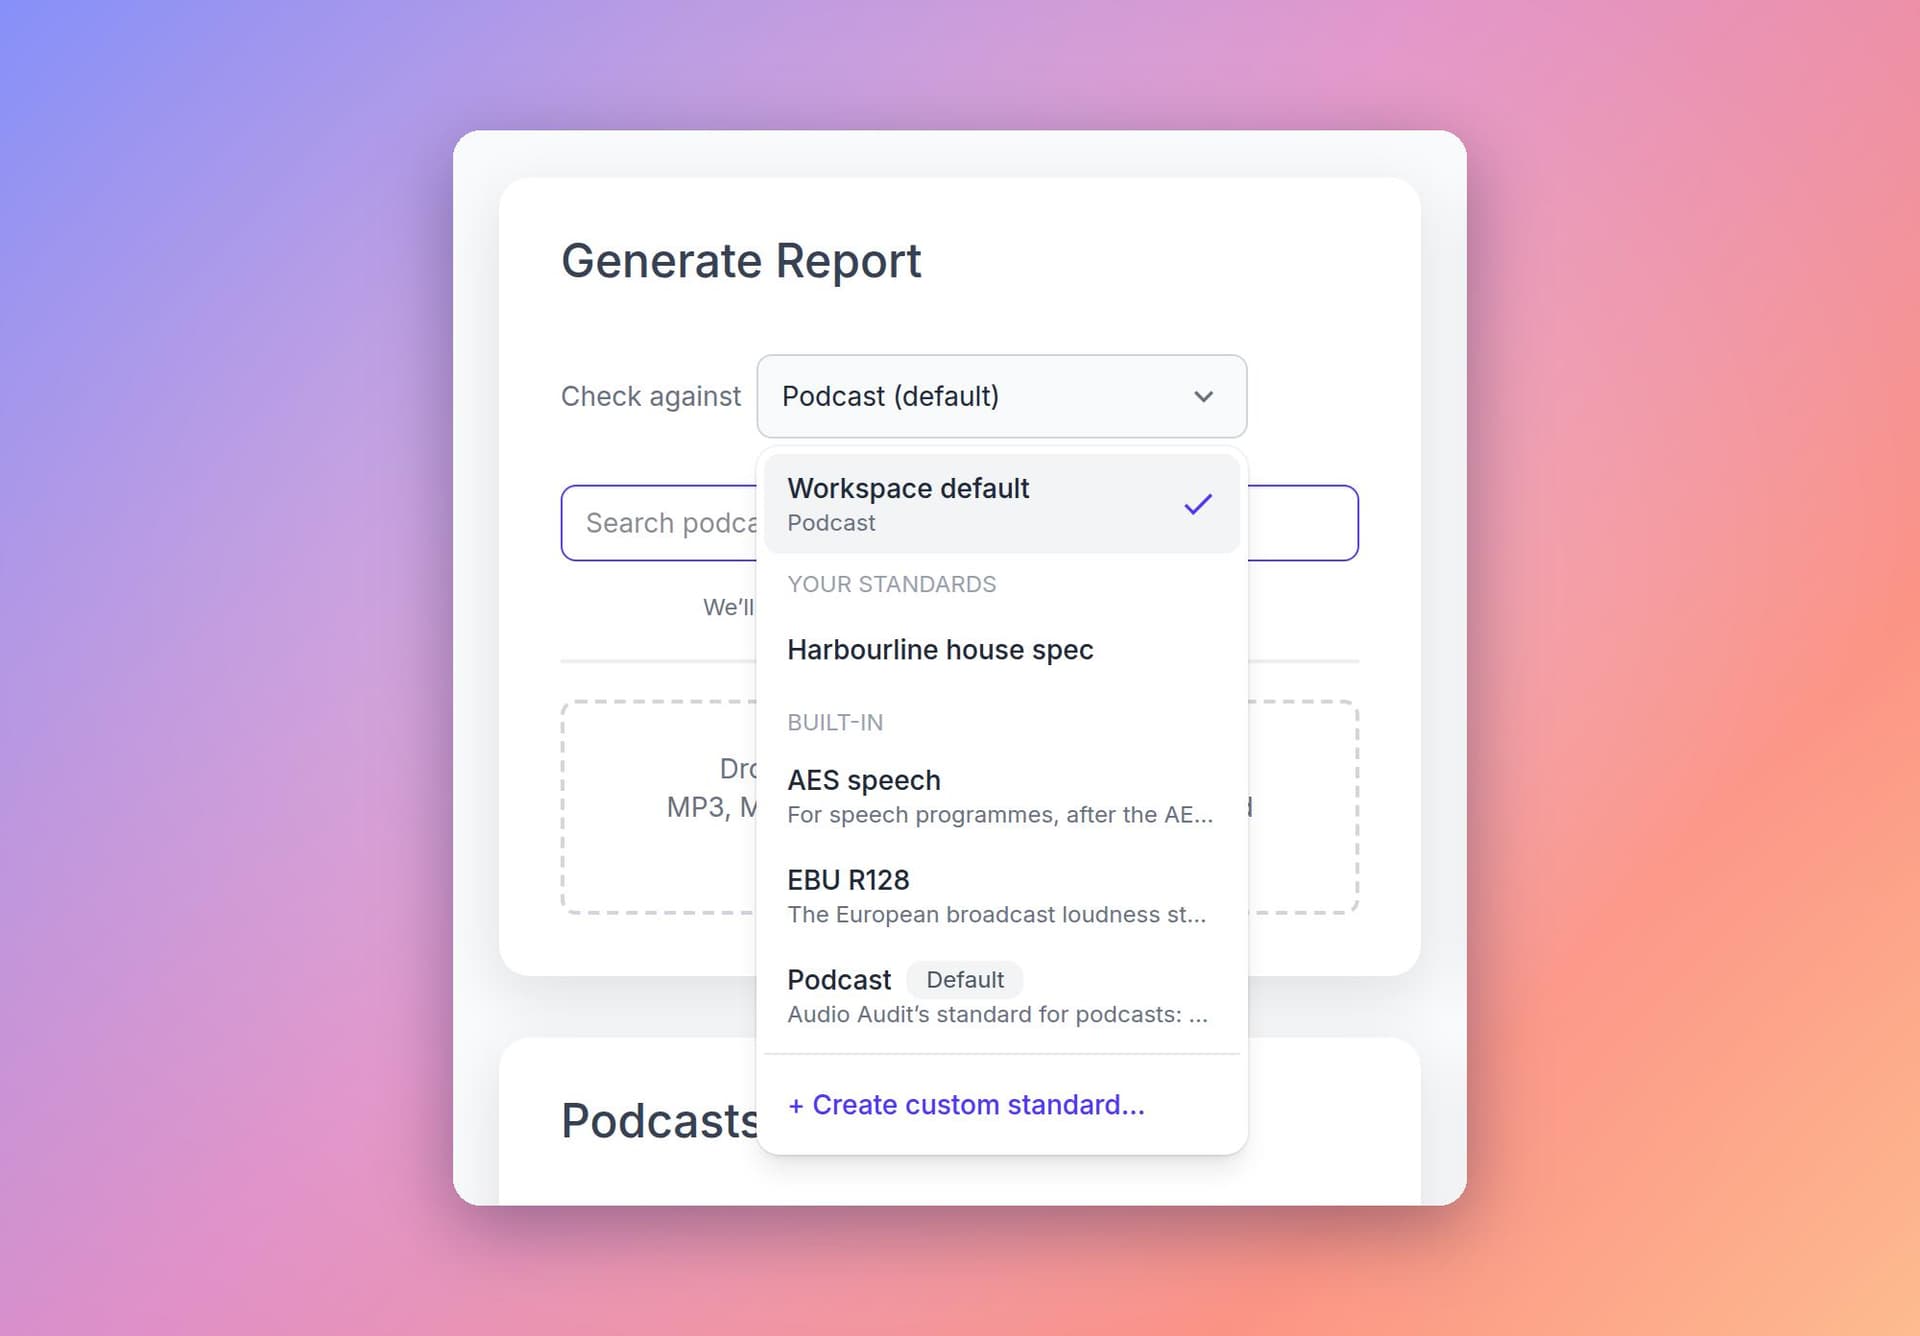
A workspace can hold up to 10 custom standards of its own, and the built-ins don’t count towards that. Once a workspace reaches 10, the create option leaves the menu until one is deleted.
Pay Only for What Runs
When we moved to credits, we said you’d one day be able to turn off the checks you don’t need and pay only for the rest. Custom standards are that day.
Checks set to Off aren’t measured and aren’t charged. The two most expensive parts of a report follow the same rule:
- Transcript, at about 2.1 credits per minute of audio (around 126 an hour). Every standard has a Transcript option. It’s on by default, and it stays ticked while any speech check is Required or Informational: profanities, restarted sentences, the explicit flag, unwanted words or expected words. Turn those off and you can untick it, and the standard’s reports skip transcription.
- Noise detection, at about 2.8 credits per minute (around 168 an hour). It runs only while the Unwanted noises check is Required or Informational.
The Podcast built-in comes to about 564 credits an hour. A technical-only standard, with the speech checks, the transcript and Unwanted noises all off, comes to about 252.
You can also keep the transcript on with no speech checks at all, if you only want the transcript and its WebVTT, SRT and text downloads. Either way it’s charged once per report. The editor shows an Estimated cost per hour of audio that updates as you change the standard.
Your Past Reports Don’t Move
Every new report keeps a frozen copy of the standard it was judged against. Editing a limit, renaming a standard or deleting it never changes a report that already exists. Reports created before custom standards are judged against the Podcast standard and keep their scores.
Who Can Do What
- Owners and Admins create, edit, duplicate and delete standards, and set the workspace default.
- A show’s Managers choose which standard that show uses, from its settings page.
- Anyone who can run reports can choose a standard for an upload.
In a personal workspace, you do all of it yourself.
How to Get Started
- Open Settings → Standards and duplicate the built-in closest to your spec.
- Adjust the limits, set each check to Required, Informational or Off, and decide on the Transcript option.
- Click ”Set as default”, pick the standard in a show’s Standard setting, or choose it from ”Check against” on the Dashboard the next time you add a show or upload a file.
What’s Next
Standards are the base for the next round of work on reports. Report emails can already reach you only when a Required check fails. Next is a score measured against your own standard rather than a plain count of checks. We’ll post here when it’s ready.
For every detail, see the Standards guide, Creating Reports and Billing & Plans. Questions about setting up your own spec? Get in touch with our support team.
Photos courtesy of Egor Komarov